Follow Me on Pinterest!

Friday, August 2, 2019

Rocking Chair Makeover

As I said before, and I'm sure I'll do again, I had a LOOONG list of projects that I wanted to complete this school year.  One of the many things I wanted to do ( and have wanted to do for a while) is makeover a rocking chair for  my classroom.

All my babies are big enough to not need rocked at night (insert simultaneous happiness and sadness) so I decided to make over a rocking chair we had at home.

This rocking chair had a matching cover to the seat that went up the back.  I just removed the cover and cleaned it really well.


Then I covered with 2 coats of white chalk paint.  Seriously, that stuff is AMAZING!  I bought some at my local hardware store and sealed it with the spray chalk paint sealant.  I used an outdoor patio chair cover for this.  I purchased it thru Amazon.  I bought it on Prime Day, so it was around $40.  


I'm so pleased with how it turned out.  Do you have a rocking chair in your classroom?


Thursday, August 1, 2019

Summer Project-Lego Table

I took on soooooooooo many different projects this summer.  Seriously, I have no idea what I was thinking.  However, they are all finally coming to completion.  I had the idea of making a LEGO table for my classroom last year after my mom gave me my old LEGO table for my children at home.  It wasn't hard, and didn't take that long.

STEP 1:So this is what I started with.  The first step of this project, like many projects, it to pick out a piece.  Then destroy it beyond repair and pick a different piece.

STEP 2: Have some wine and contemplate your project handiness.  

STEP 3: Pick another end table that you won't miss.  Extra points for 80's retro gold.


STEP 4: Pick a paint color.  I wanted to do something that was LEGO blue.  I did one coat of white chalk paint to help cover up the black.

STEP 5:  Forget to take picture of chalk paint foundation.

STEP 6: Paint it your chosen paint color.  I had to do 2 coats of the blue, and did 3 in some spots.  Here is what it looked like then.  


STEP 7:  Drink some more wine and/or iced coffee.  Seal the paint with your choice of paint sealer.

STEP 8:  Add LEGO slats.  Here is the link that I used to buy the LEGO slats.  I cut them to size with some regular scissors.  

STEP 9: Gorilla Glue it on.

STEP 10:  Play with Legos on table to make sure it works.  Kids are experts at this!


STEP 11:  ENJOY YOUR NEW LEGO TABLE!!!


Overall, I'm very happy with how it turned out.  I'm excited to see how my Kinders use it this year.  

Happy August 1! Have a great school year!


Saturday, January 20, 2018

Pajamas and Pancakes

We just wrapped up our first full week after winter break-and I gotta tell ya-it was kinda tough.  We made it through however!  Thank Goodness!

This week our letter with our reading curriculum was letter P.  What better way to finish up the week than with Pajamas and Pancakes?  We mixed the pancakes.........

Put them on the griddle........


and ate the yummy pancakes!


It was really fun to see the kids watch the pancakes cook.  They loved it!

Friday Fun was in full swing this week!  We wrapped up our snowman unit with two wonderful activities.  I saw this activity from Babbling Abby, which we completed after reading The Snow Globe Family.  So Fun!


We also sprayed the blue circles with glitter hair spray, which makes them sparkle just a little bit.  They are super cute!

We also did this activity, which I found from The Primary Pack after reading Sneezy the Snowman.  

Sneezy the Snowman
(this image is copied from her blog, I forgot to take a picture of mine :-) 

It is super fun for the kids to do.  She used equal parts glue and shaving cream--I like to use 2 parts shaving cream to 1 part glue to make them a little puffier.  

I hope your January has treated you well.  Stay Warm!


Monday, December 4, 2017

It's Been a While

Hello all!

I cannot believe how crazy this year has gotten.  October is always a crazy month in our household, but it seems like November didn't slow down at all.  Anywho, I have FINALLY finished my Christmas Literacy Centers.  With all of my center bundles, they are differentiated three different levels.  I like my centers to be something that the kids can do independently, correctly, and in the time frame that I run other groups in (about 15 minutes or so).  Also, the digital paper that the

The Write the Room can be done with 2-3 syllables, 2,3,4 syllables, or fill in the word in the sentence.


The Ispy, where you color the matches by beginning sound, ending sound, or medial sound.

Santa Sorting File Folder Activity-Sorting Syllables or putting words in the correct sentence.

Gingerbread First Sounds, First and ending sounds, and CVC words.

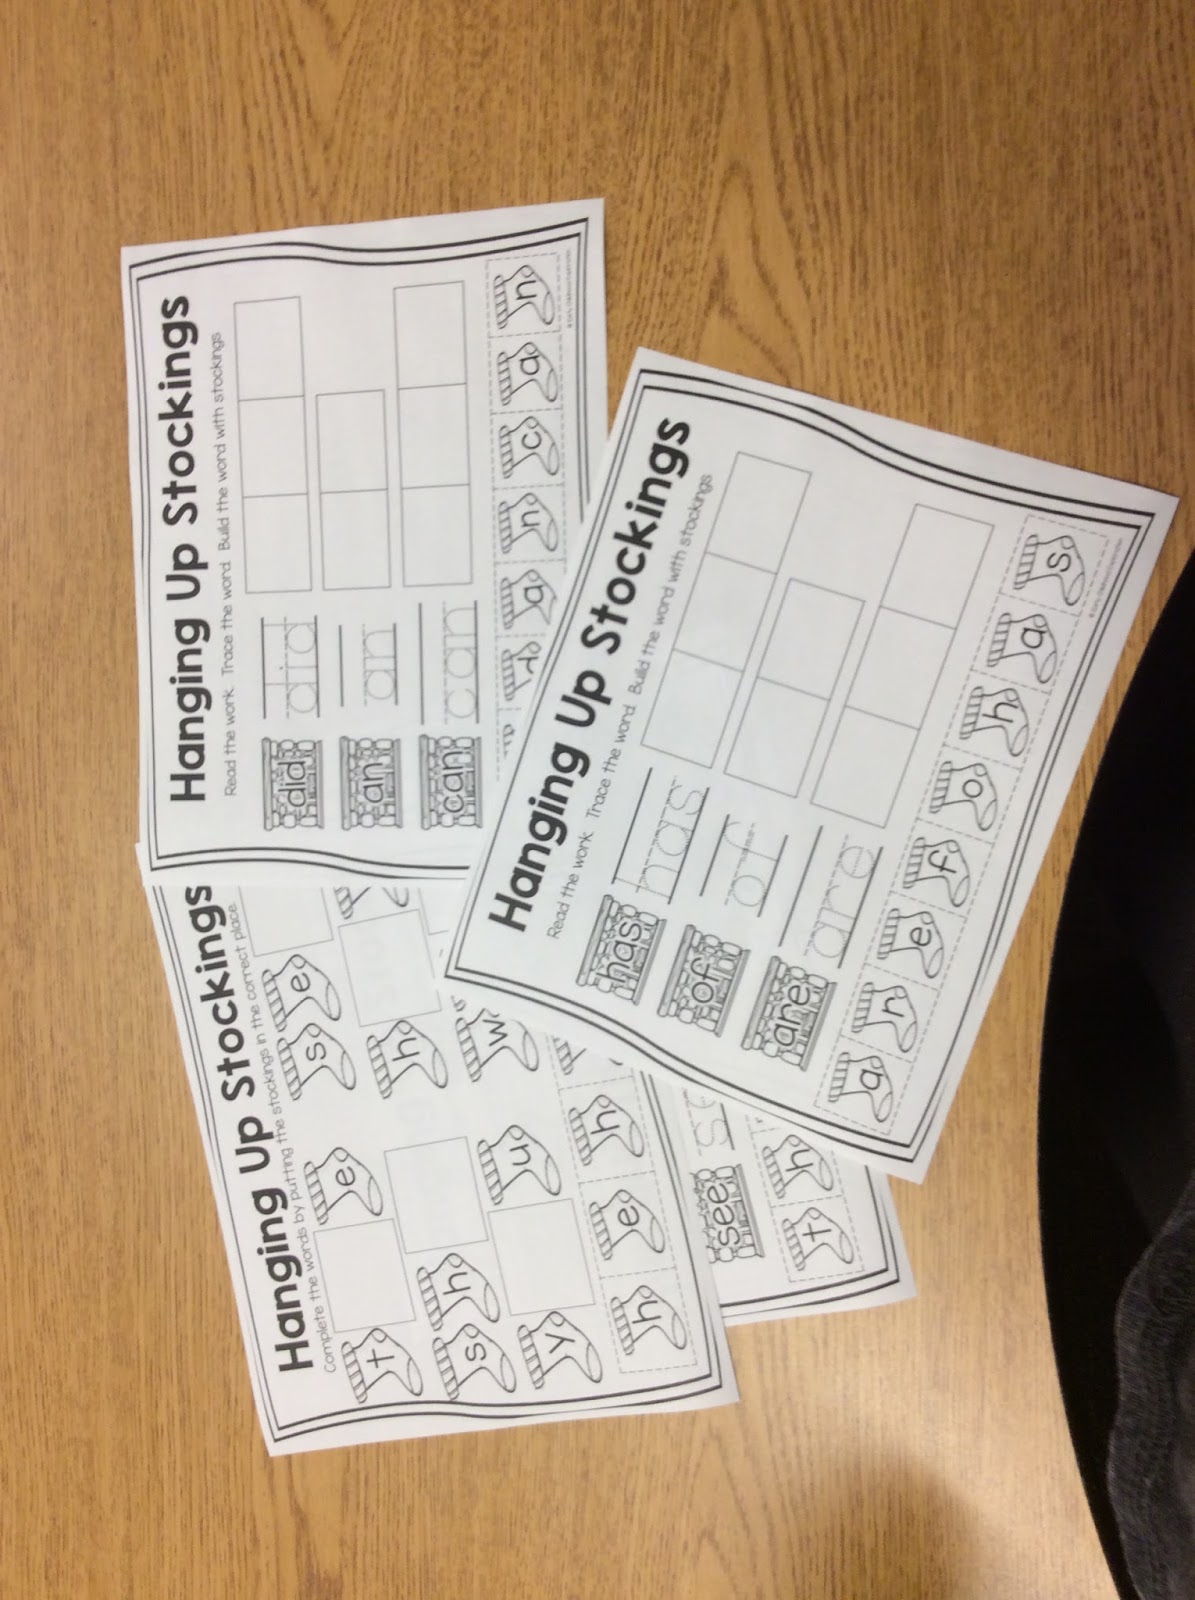
Hang up the stockings-word matching, one letter missing, and creating sight words.


Pocket Chart-Put the Christmas Lights in Order with some put together, with capital letters, and with mixed letters.  There is also a recording sheet for students to write their letters on. 

And for some reason, when I was at school today, I had a total mental block to take a picture of the reindeer word family sort and sentence scramble.  There is also a sensory scramble.  Put all of the pieces in a sensory bin.....

and students put together either word puzzles, onset rhyme puzzles, or CVC puzzles.


E-L-F bingo-phoneme segmentation Bingo!


and Super Fun Find the Rhyme!

Also Included is Independent Work for each skill at different levels.


You can purchase this in my TPT store here.  You can also check out other literacy and math bundles.  Hopefully your December has been as great as mine.  Only three weeks left until break!  So excited!


Sunday, September 24, 2017

Apples Galore

We had an awesome second week of apples!  The kids looooovvvvveeeeedddd making apple pie!  Here is what our yummy snack looked like-

It was super yummy!  We had fresh apples, apple cider, apple pie, and apple sauce.  I love fall!

On Thursday, I had the kids help make the apple pie filling and topping.  They did an awesome job!


The kids helped cut up the apples using plastic knives.  


We mixed all of the yumminess together.  


This was the finished pre-baked product.  I took the pies home and baked them.  On Friday, I had a wonderful parent volunteer that cut up the apples to make apple sauce. 


Then we graphed our favorite apple.  The choices from left to right are apple pie, apple cider, apple sauce, or raw apple.  


We used my All About Apples bundle to go with this.  


This comes with a Johnny Appleseed story, Apple Life Cycle activity, Apple Browning observations (which we did last week), Apple labeling activities, Class graphing activities, Who stole the Apple from the Apple Tree? Class book, 4 part sequencing page, 6 part sequencing page, and Apple Vocabulary Cards.  Here is a picture of our class graph-


It was an awesome week!  How do you like your apples?


Monday, September 18, 2017

Differentiated Center Set-Up

I am so happy to finally be at the point in the year where we are starting to get the routine down.  The kids are really starting to get into the groove of things.  I did introduce my centers to my kiddos two weeks ago, but they have been pretty simple.  This is the first week we have differentiated them.

I do love how this system runs.  I feel like it is the best way meet the needs of my kiddos.  My centers are differentiated more for my Math Groups, because we ability group for Reading.  I will do some, but it is not as needed as in Math.  Each student does a different center activity every day.  This way, each student at a center is engaged, but not around others, as to alleviate some behavior issues.

Here is a look at how I set up centers.  These are the bins that hold all of the center items.  I have 6 different centers in my room.  Centers 1 and 4 are iPads, so they are not in a bin.


This is a pocket chart that tell students what center they are at for the day.  I run three groups for Reading and Math.  One group with me, one group at centers, and one group at independent work or with a parent volunteer or assistant.  My centers are 1-iPad, 2-Write the Room or I Spy, 3- File Folder Game, 4- iPad, 5-Manipulative-based, and 6-pocket chart.  I have had 7 centers if I need to, but I usually just add another manipulative based center.  This year, we were able to add another Kinder teacher, so we have smaller classes.  It has been WONDERFUL!  Anywho, moving on.....


This is posted above the pocket chart.  This is a good way for students to remember what group they are in if they don't remember.  


Ok, now this is where the the differentiation comes in.  Each bin has 3 manilla folders in it.  Each group has a different activity based on what they are able to practice correctly and independently.  This works really well.  The kids are great about putting their items back in their folder.  Again, it takes about a week of just teaching centers to make it go smoothly.  But after the routines are set up, it is wonderful.  This works great with my Differentiated Apple Math and Differentiated Apple Literacy Centers.


Here are some of the examples of what might be in the different folders.  This is a file folder game.  Group 1 is matching quantities to numbers up to five, Group 2 is making 5 with red and green apples, and Group 3 is making ten with apples.  File Folder Games are center #3. 


This is the I Spy.  Students go thru and circle numbers either up to 5, 10, or 20 depending on their group.  


Here is a picture of one of my reading students doing this.  


Here are some of my manipulative activities that I have as well.  


There is a lot of information here.  Check out my Differentiated Apple Math and Differentiated Apple Literacy Centers, or look at my Mini Bundle.  I have one for each month.  Just print and go!

We have officially been in school for 17 days, and now that centers are rockin, we are ready to take off!  How is your year going?